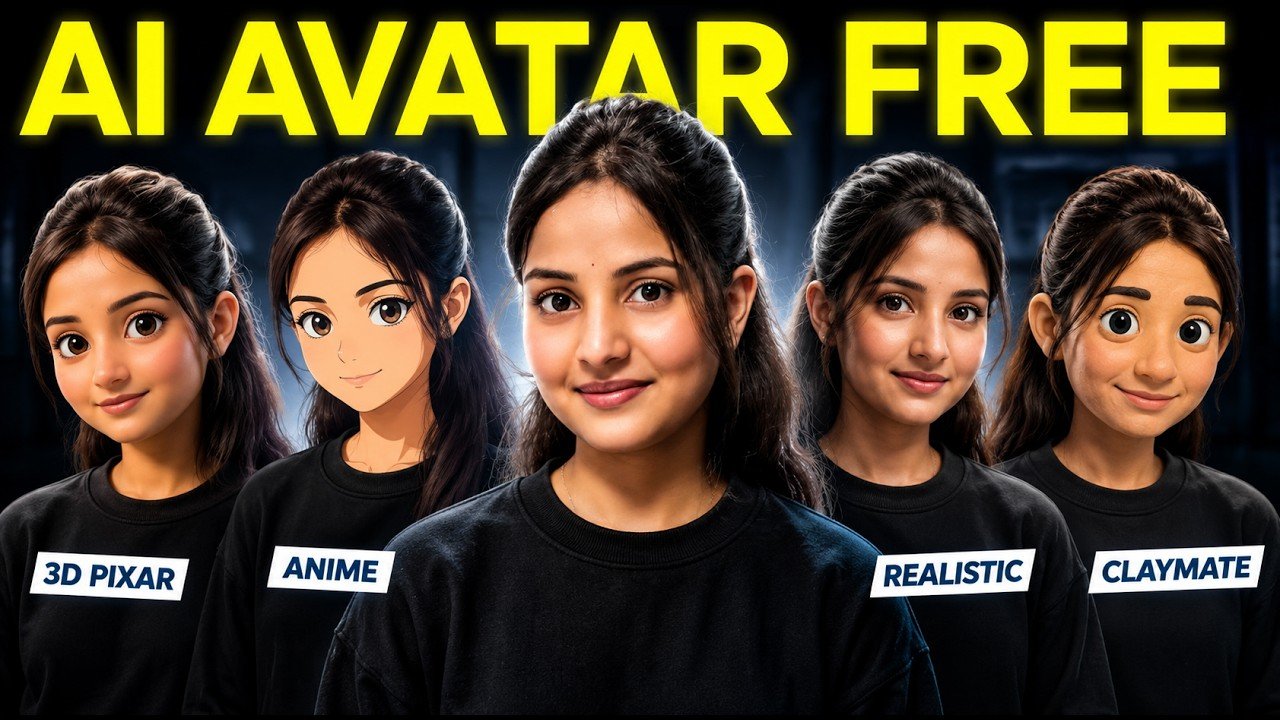
AI avatars are becoming increasingly popular among YouTubers, Instagram creators, educators, marketers, and faceless content creators. Instead of recording yourself every time, you can create a digital avatar that speaks your audio with realistic lip sync, natural hand gestures, and body movements.
The interesting part is that you can build this workflow using free or freemium AI tools.
In this guide, you’ll learn how to create a realistic or cartoon-style AI avatar, animate it with natural movements, add your own voice with lip sync, improve the video quality, and prepare the final result for social media.
What Is a Talking AI Avatar?
A talking AI avatar is a digital character that can speak using either text or uploaded audio. AI synchronizes the character’s mouth movements with the voice, creating the appearance that the avatar is actually speaking.
Basic avatar generators often animate only the face or lips. For a more engaging result, however, you can first create a short video with natural hand gestures and body movements and then apply lip synchronization to that video.
This makes the final avatar feel much more dynamic.
Tools Used in This Method
The workflow uses a combination of AI tools:
- Google Flow for image generation and animation
- ChatGPT or Google Gemini as alternatives for creating the character image
- DreamFace AI for talking-avatar generation and lip sync
- AirBrush for video cleanup when required
The exact free limits, credits, features, and availability of these tools may change over time, so always check their current plans before starting.
Step 1: Choose Your Avatar Style
First, decide what kind of avatar you want to create.
You can create a realistic AI version of yourself or transform yourself into a stylized character such as a 3D cartoon, anime character, or another creative visual style.
For either option, you need a clear reference image.
You can use an existing photograph or take a screenshot from one of your videos. Try to choose a frame where your face is clearly visible and the overall image quality is good.
A clean reference image generally makes it easier for the AI to produce a consistent character.
Step 2: Convert Your Photo into an AI Character
Upload your selected image to Google Flow.
Add the image to your prompt and give the AI a simple transformation instruction such as:
“Convert this image into a 3D animated character style.”
You can replace the style description depending on the look you want. For example, you could request anime, realistic cinematic, clay-style, comic-inspired, or another visual treatment.
Select the required aspect ratio and number of images, then generate the image.
You don’t necessarily have to use Google Flow for this stage. You can also use image-generation capabilities available through tools such as ChatGPT or Google Gemini.
Once you get a character you like, save the best image.
Step 3: Turn the Avatar Image into a Video
Now you need to animate your static character.
The goal at this stage is NOT to make the avatar speak. Instead, create natural body movements and hand gestures while keeping the mouth relatively neutral.
Upload or select your generated avatar image in Google Flow and use an image-to-video model.
Your animation prompt should focus on subtle actions such as natural hand gestures, slight head movements, blinking, breathing, and small body movements.
Avoid exaggerated movement because the final video will later be synchronized with speech.
For example, you can instruct the AI to create a presenter-style animation where the character naturally gestures while looking toward the camera.
For this workflow, a short clip of around 10 seconds works well.
Generate the video and check that the character remains visually consistent throughout the clip.
Step 4: Download the Animated Avatar Video
Once the animation is ready, preview it carefully.
At this point, your character should appear alive and expressive but should not actually be delivering the final dialogue.
Look for:
- Natural hand gestures
- Smooth body movement
- Stable facial identity
- Minimal visual distortion
- Consistent clothing and background
- No unnecessary mouth movement
If everything looks good, download the video.
Step 5: Open DreamFace AI
The next stage is where the avatar starts talking.
Search for DreamFace AI and open its official platform. Create an account or sign in using one of the available login methods.
Navigate to the avatar-generation feature.
Depending on the current interface, you may be able to upload either an image or a video.
For this particular workflow, uploading the animated video is preferable because the video already contains hand gestures and body movements.
If you upload only a static image, you may get good lip synchronization, but the character can feel less dynamic because there is less full-body movement.
Step 6: Add Your Voice
After uploading your animated avatar video, add the dialogue.
There are generally two approaches.
You can enter text and use an AI-generated voice, or you can upload your own recorded audio.
Uploading your own audio is particularly useful when you want to preserve your personal voice, pronunciation, speaking style, and emotion.
Select the audio option, upload your recording, and generate the talking avatar.
The AI will process the video and synchronize the avatar’s mouth movements with your audio.
Step 7: Match the Audio and Video Length
This is one of the most important parts of the workflow.
Try to keep your audio duration close to the duration of your original avatar animation.
For example, if your animated avatar clip is 10 seconds long, use approximately 10 seconds of dialogue.
If the audio is significantly longer than the source animation, the movement may begin to feel repetitive or less natural.
A better approach for longer videos is to create multiple short avatar clips.
For example, instead of attempting one long continuous avatar generation, you could produce several short segments and combine them during editing.
This can help maintain more consistent gestures and visual quality.
Step 8: Generate the Talking AI Avatar
Once your video and audio are ready, start the generation process.
DreamFace AI will combine your animated character with the uploaded voice and create a talking avatar.
Preview the result carefully.
Pay particular attention to:
- Lip synchronization
- Facial expressions
- Eye movement
- Hand gestures
- Body movement
- Character consistency
- Audio timing
If the mouth movement matches the speech naturally while the original hand gestures remain intact, your talking AI avatar is ready.
Step 9: Enhance the Video Quality
If the generated avatar looks slightly blurry or compressed, you can use a video enhancement feature when available.
Video enhancement can help improve perceived sharpness and overall presentation quality, especially when the video will be uploaded to YouTube Shorts, Instagram Reels, or other social platforms.
However, enhancement cannot completely repair a badly generated source video, so always start with the highest-quality avatar image and animation possible.
Step 10: Handle Watermarks Properly
Some free AI tools may add a watermark to exported videos.
The safest approach is to check whether the platform provides a legitimate watermark-free export through its free credits, trial, subscription, or licensing options.
You can also design your social-media layout so that branding does not interfere with important parts of the video.
Always review the platform’s current terms before modifying or removing platform branding.
How to Create Longer AI Avatar Videos
For longer videos, dividing your script into smaller sections can produce better results.
Suppose you want to create a one-minute AI avatar video. Instead of forcing the entire script into a single generation, divide it into several shorter clips.
Generate each segment separately with corresponding audio and then combine all clips in a video editor.
This gives you more control over gestures, pacing, lip synchronization, and visual consistency.
You can also change camera framing slightly between clips to make the final video more engaging.
For example:
Clip 1: Medium shot with subtle hand gestures.
Clip 2: Slightly closer framing.
Clip 3: Different hand movement.
Clip 4: Small camera push-in.
Clip 5: Return to the original composition.
These small variations can make an AI-presenter video feel much less repetitive.
Tips for Better AI Avatar Results
Always begin with a high-quality reference image where the face is clearly visible. Keep the character facing mostly toward the camera if accurate lip synchronization is your priority.
Use subtle gestures rather than aggressive body movements. Excessive head turns or fast hand movements can make AI-generated footage unstable.
Record clean audio with minimal background noise. Clear speech makes synchronization easier and generally improves the final result.
Keep individual generations relatively short when possible. Short clips are easier to regenerate if something goes wrong and can be combined later during editing.
Most importantly, maintain character consistency. If you’re creating several clips for the same video, use the same reference character, clothing, hairstyle, background, and visual style unless a scene change is intentional.
Realistic Avatar vs Cartoon Avatar: Which Is Better?
Both approaches can work well.
A realistic AI avatar is ideal for educational videos, tutorials, business content, explainers, personal branding, and professional presentations.
A stylized or cartoon avatar can be more suitable for entertainment content, AI-focused channels, storytelling, Shorts, Reels, and creators who want a distinctive visual identity.
There is no universally better option. Choose the style that matches your audience and content.
Can You Make AI Avatars for Free?
Yes, it is possible to experiment with talking AI avatars using tools that provide free access, free credits, trials, or limited generations.
However, free plans frequently change.
Generation limits, maximum video duration, resolution, watermarks, commercial-use rights, and daily credits can all be modified by the platforms.
Therefore, don’t build your entire workflow around a specific number of free generations without checking the tool’s current pricing and usage terms.
Final Thoughts
Creating a talking AI avatar no longer requires advanced animation or video-production skills.
A simple workflow looks like this:
Photo → AI Character → Animated Video → Voice/Audio → Lip Sync → Enhancement → Final Edit
The biggest improvement comes from animating the character before adding the voice. Instead of producing an avatar where only the lips move, you can create a character with natural hand gestures and body movement and then synchronize the dialogue afterward.
This produces a much more engaging result for YouTube videos, Shorts, Instagram Reels, tutorials, educational content, and AI-powered social media videos.
With a good reference image, clean audio, short animation clips, and carefully controlled movements, you can create convincing talking AI avatars without needing traditional character-animation skills.
